Cognigy.AI
Cognigy.AI was developed in order to overcome most of the challenges in building conversational AIs. One of the unique aspects of the platform, is the bundling of - conversational AI related resources - in a user-friendly interface.
- From the Cognigy.AI documentation
Integrating Cognigy.AI with your Airy Core instance enables you to leverage its conversational AI capabilities on all your instance's channels. When Cognigy.AI is integrated with an Airy Core instance, Airy Core will forward the messages to the Cognigy.AI agent's installation, which will respond to the Airy Core API according to its conversation flow.
Airy Core includes an internal Cognigy.AI connector that you can install on your Airy Core instance: this page will guide through the installation and configuration process.
- How to configure your Cognigy.AI agent
- How to connect Cognigy.AI to your Airy Core instance through Airy Core's Cognigy.AI connector
- A running Airy Core installation (refer to the Get Started section)
Step 1: Create a Cognigy.AI Live Agent
The first step is to create an account on the Cognigy.AI platform. Next, create a Live Agent: this guide from the Cognigy.AI documentation details the necessary steps.
Step 2: Create a Cognigy.AI Flow
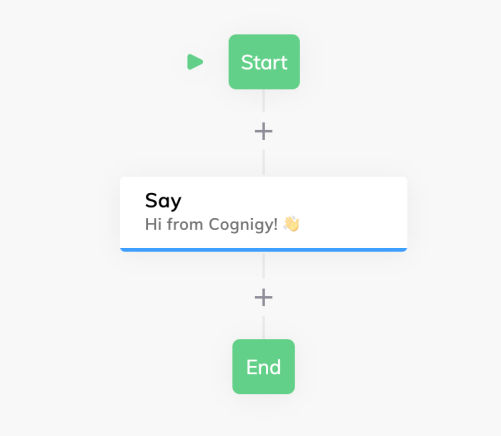
A conversation Flow describes the logic and sequence of a conversation. It defines what your Virtual Agent (VA) can do and how it handles the interaction.
- From the Cognigy.AI documentation
The second step is to create a Flow on the Cognigy.AI platform: this guide provides excellent step-by-step instructions.
Here is a screenshot of a simple Cognigy.AI Flow:
Step 3: Create a Cognigy.AI REST Endpoint
The REST Endpoint lets you connect to a Cognigy Flow directly through a REST interface.
- From the Cognigy.AI documentation
On your agent dashboard on the Cognigy.AI platform, select Endpoints from the Build section of the sidebar menu. Click on the button + New Endpoint: this will trigger a configuration menu to open.
Type a name for this Endpoint, select the Flow you previously created in the Flow dropdown, select REST from the Endpoint Type list (scroll down to find the REST type) and click on the Save button to save this configuration.
Note down your REST Endpoint URL, you will need it later on for the step 6.
Step 4: Create an API key
We now need to create an API key in order to use the Cognigy.AI API.
Click on the avatar icon on the navigation menu and select My Profile in the dropdown.
On your profile page, scroll down to the API Keys section and click on the + icon to generate a new API Key.
Note down your API key, you will need it in the next step.
Step 5: Find your Cognigy.AI user ID
One way to get your Cognigy.AI user ID is to use the Cognigy.AI API sending a GET request to /flows. This request serves the data from the Flow(s) created.
Navigate to the Cognigy.AI Open API: this interface enables to easily use the Cognigy.AI's RESTful web services.
Paste the API Key you generated in the previous step in the Authentication's API Key input at the top of the page (below Send api_key in query with the given value).
Then, scroll down to GET /flows and click on the TRY button.
You should get a 200 Response status along with the Flow's data as the response body. The createdBy string is your user ID: note it down, you will need it in the next step.
Congratulations! You are now ready to connect Cognigy.AI to your Airy Core instance 🎉
Connecting this component to your Airy Core instance can be done in 2 ways:
- through API request (using API platforms such as Postman)
- or through the Airy Control Center UI
We cover both options in this section: keep reading for connection via API request, scroll down to the next section for connecting it via the Airy Control Center UI.
Step 6 (option 1): Install and configure Cognigy.AI to your Airy instance via API request
Send an API request to the Components Install endpoint to install Cognigy.AI on your Airy instance.
The request body should be:
{
  "name": "cognigy-connector"
}
Once the installation is successful (indicated by a 200 response status code), you can configure the component with the Components Update endpoint.
Use the REST Endpoint URL and User ID you got in the previous steps (step 3 and step 5) to compose the request body:
{
  "components": [
    {
      "name": "cognigy-connector",
      "enabled": true,
      "data": {
        "cognigyRestEndpointURL": "yourRestEndpointUrl",
        "cognigyUserId": "yourUserID"
      }
    }
  ]
}
The request is considered successful if the component's name (in this case: cognigy-connector) is returned in the list of configured components.
{
  "components": {
    "cognigy-connector": true
  }
}
Cognigy.AI is now installed and configured.
Step 6 (option 2): Install and configure Cognigy.AI to your Airy instance via the Control Center UI
On the Airy Control Center UI, navigate to the Catalog and select Cognigy.AI. Click on the Install button.
Once the installation is completed, navigate to the Control Center's Connectors page and select Cognigy.AI: this will open the connector's configuration page.
Paste the REST Endpoint URL and User ID you got in the previous steps (step 3 and step 5)
in the respective fields and save this configuration.
Cognigy.AI is now installed and configured.
Step 7: Cognigy.AI's connection with Airy
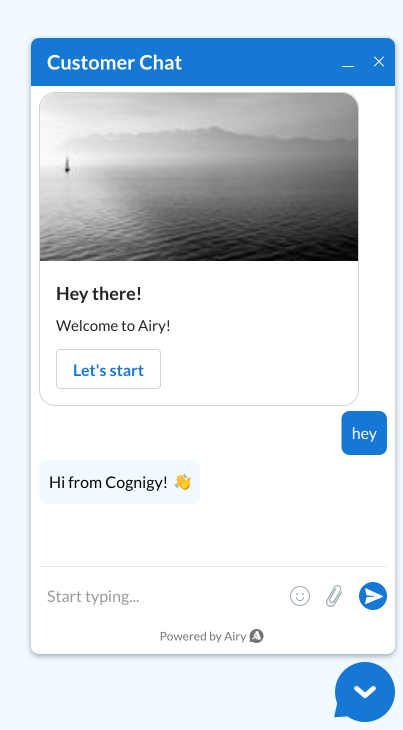
To test the connection, write a message to one of your channels: Airy Core will forward it to your Cognigy.AI installation, which will respond to the Airy Core API according to its conversation Flow.
The screenshot below was taken on a Airy Live Chat Plugin channel from an instance connected to Cognigy.AI through Airy Core's Cognigy.AI connector. It shows an example where a message sent to Airy Core is automatically responded to according to a Cognigy.AI Flow where the Live Agent responds "Hi from Cognigy! 👋" to a contact's first message.